I use TP-Link Omada line in my house, unironically, because its cheap and super effective and there are a million parts on eBay that still work REALLY well. If you don’t have a homelab setup and want an easy / fast way to get managed switching into the house without learning too awfully much about network, Omada might be a great choice for you.
To get you started, you only need a few basic things, a firewall, switch and a controller.
If you’re not shy about buying things on eBay, you can always, always play the “wait for someone to post these things on Best Offer and beat them up with lowballs”. Heck, you can occasionally save some money with Amazon Renewed devices (which I would run with zero issues in a homelab environment). At the time of this writing (March 2025), the prices on the devices I linked are:
| Device | Model | Price New | Amazon New | Price “Renewed” | Amazon Renewed |
|---|---|---|---|---|---|
| Firewall | ER605 V2 | $57.99 | Amazon New | ||
| Switch | ES205G | $38.42 | Amazon New | ||
| Controller | OC200 | $94.99 | Amazon New | $75.99 | Amazon Renewed |
These devices will get you just enough to kick the tires (and then some, really). I run much larger switch (two of them, actually, in a stack! woo!) and a beefier firewall, but that also runs my home network, and I’m a bit of a nerd. To plop a cheap NUC on your desk with HCOS Workbench, with brand new stuff from regular ole Amazon (aka no deal hunting) for $191.40 (plus some ethernet cables). Thats crazy work, Omada.
Once you get everything home and unboxed and all that, you’ll want to plug in your firewall to your router. If you have a fancy Comcast modem with several ports, lucky you! I have Verizon Fios, and use an Omada router as my firewall, with the TV / Coax router situation downstream of the omada to feed the MOCA lines in the house (so that my wife doesn’t miss a single episode of ABC’s hit show “The Bachelor”). You’ll also want to plug the “WAN” port of the OC200 into one of the LAN ports of the firewall, and the switch into one of the ports of the firewall. Go grab a cup of coffee and your laptop while it all boots up. Interestingly, Omada offers a cloud controller so the OC200 may not even be required for you. There is also a Windows app, a linux app, and few folks even have Docker containers built (though none of them have sorted out how to bundle persistent storage in their docker image, so hope you don’t like local settings!) I have a hardware controller, and thats how I’ve set up my home lab, so I’m going to write to my experience, but a lot of this should be the same for you.
Once everything is booted, plug in your laptop’s ethernet port to a LAN port, and you should get a 192. address. Do a little ipconfig /all and figure out what your gateway is, and load that IP address up in your web browser. Next, navigate to “Devices” and sort out the IP address that your controller grabbed, and navigate to that in your browser. Once you are there, login with admin/admin.
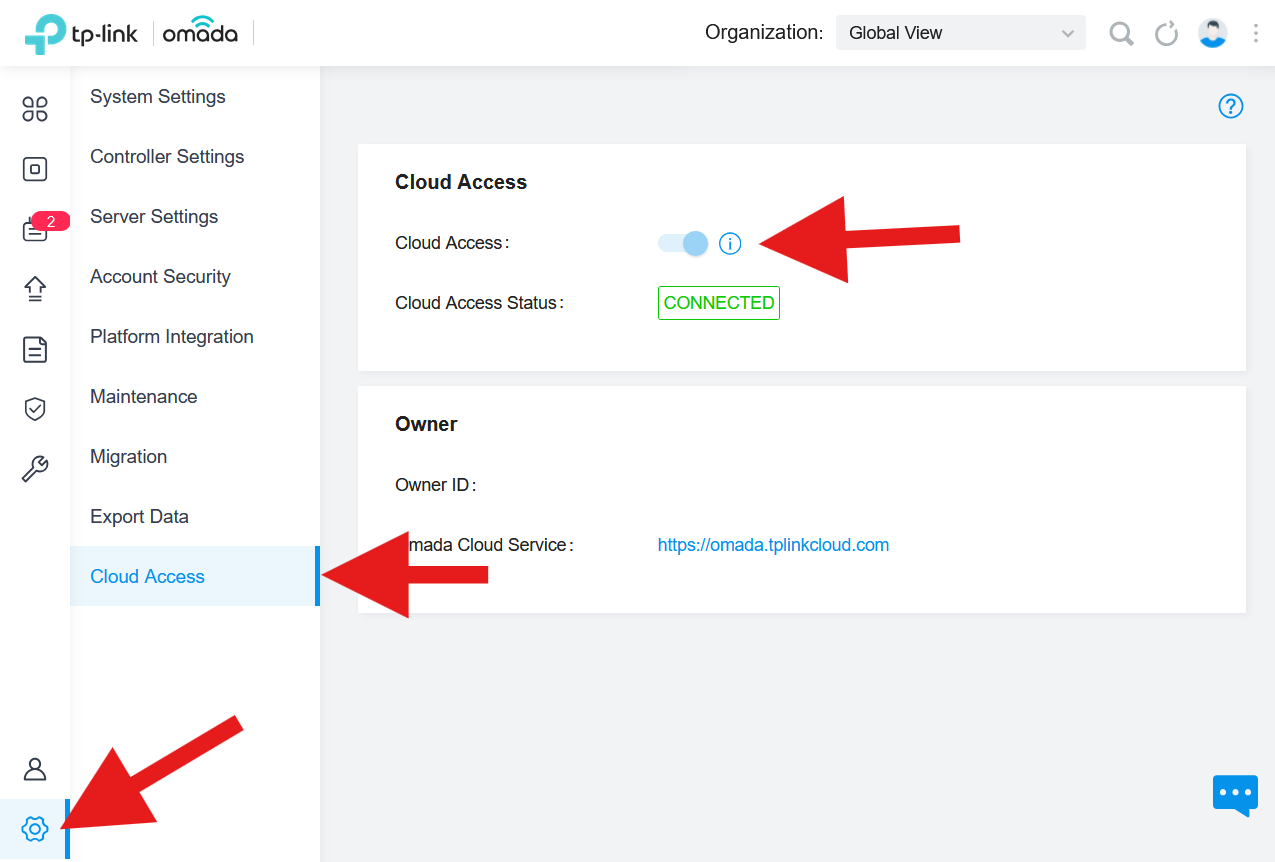
Click on the gear icon in the bottom left, and select “Cloud Access”. You’ll have to authenticate with your TP-Link ID.
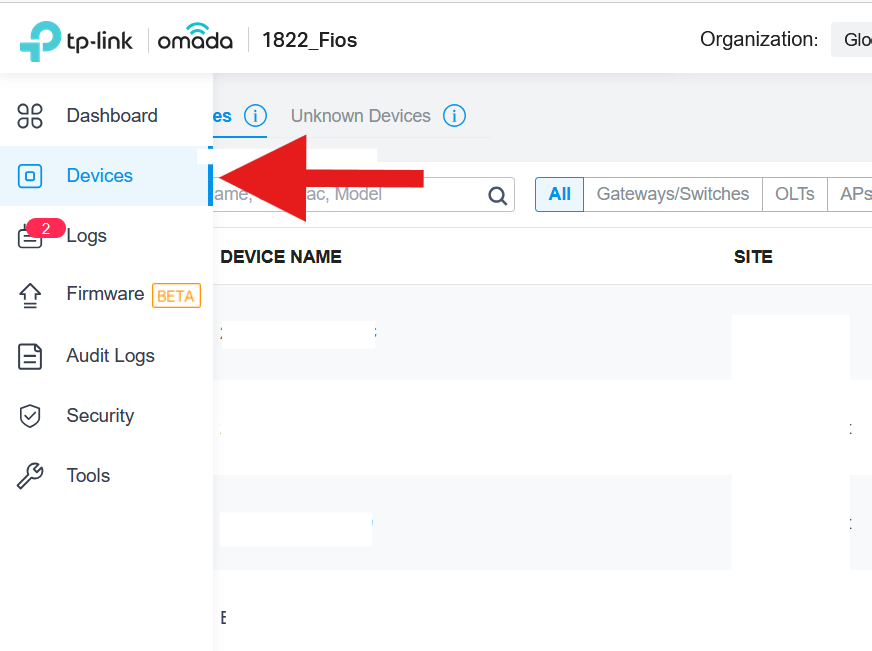
Next, head over to the “Devices” blade and start provisioning the firewall and switch that it found. I can’t guide you too awfully much on your network design, but the neatest thing about Omada is that you can expose your controller to the outside world and use it for other sites, and it will automagically site-to-site VPN them. I use this to run offsite backups at my in-laws… If I’m their on-call tech support, I’ll use some electricity for a storage appliance, thank you very much!
Once you’re up and running, able to cruise the 'Net on your laptop, reach the Omada Cloud Management Platform, and are pleased with your decision to purchase cheapo hardware, we’re ready to configure your VLANs for your Scale nodes!
Tiny note here: Scale likes static IPs, but also its good to have dhcp on the LAN you’re using for remote access purposes. I usually use a C class for my home lab because its easy and I’m not going to run out of network space. Design your network to your spec, but remember that each node needs at least one static IP, two if you’re using AMT, and a DHCP pool and lease time that doesn’t exhaust super duper easily.
Anyhow, now that you’re logged into the Omada Cloud Management Platform, select your On-Premise or Cloud-Based System, and click the little house button to “Launch”. You’ll see a site that looks suspiciously like the site you used on the controller to initially configure the network! Click on the gear for “Settings”, then expand the “Wired Networks” blade and select “LAN”.
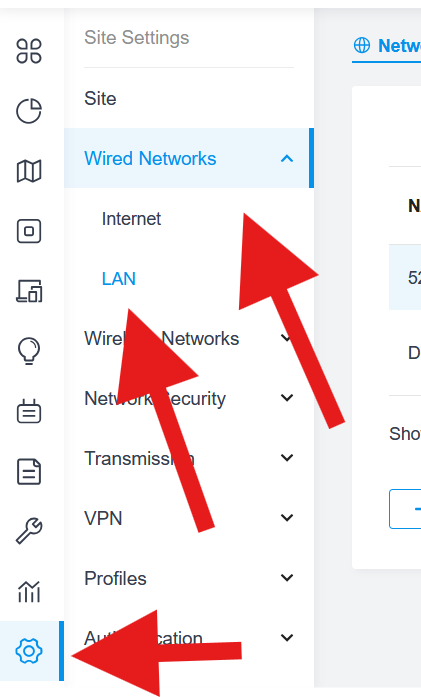
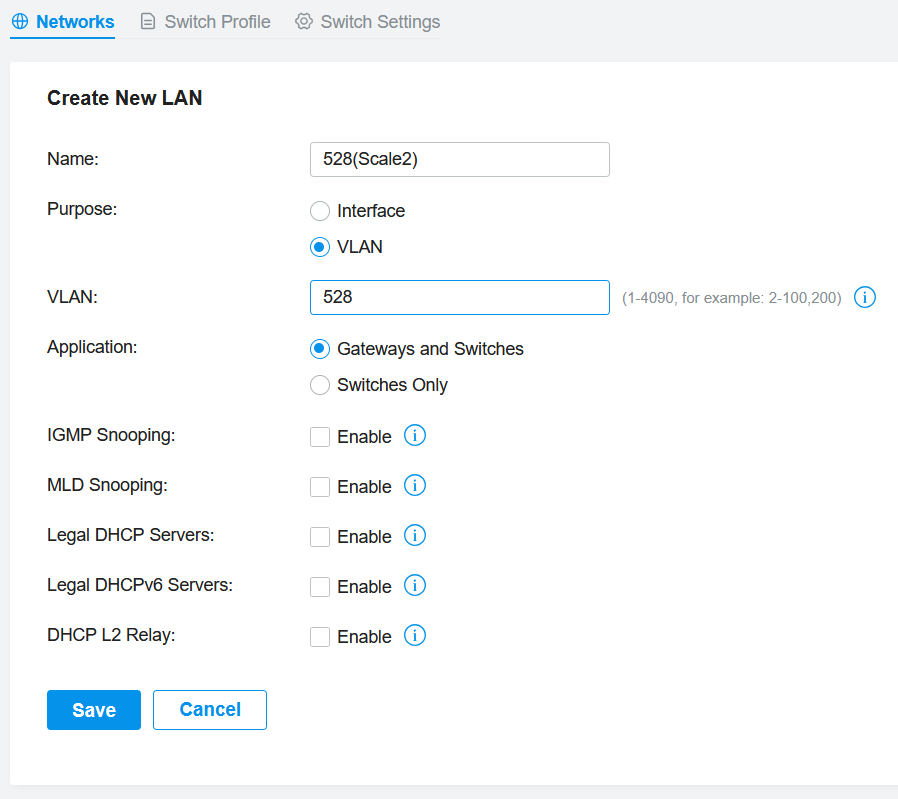
Select “Create New LAN”

I already have a cluster on VLAN527, so I’m going to create another VLAN so that I can stand up another cluster. Thankfully, no intense networking is needed here, so the configuration for the VLAN is dead simple. Fill out the info as you’d like to see it, and click “Save”. So long as there are no other VLANs with that number, you’re free to number it however you like, and however makes sense to you.
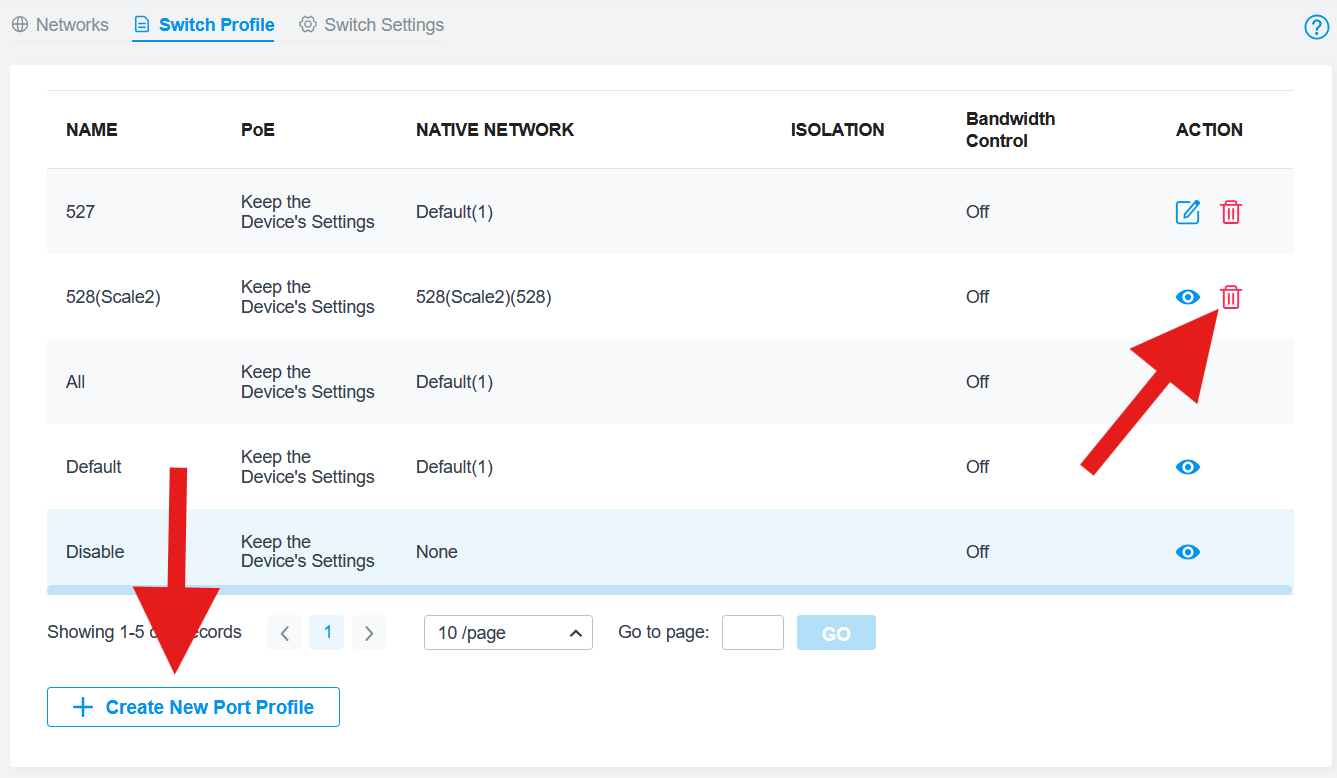
Since the official Scale Networking Guide recommends management / VLAN trunk as untagged traffic, and backplane as tagged traffic, we can set up a “Switch Profile” to make that go. When you click into “Switch Profile”, you’ll see that Omada made a profil for your new VLAN. Well, it doesn’t do what we want it to do, so delete that, and click “Create New Port Profile”.
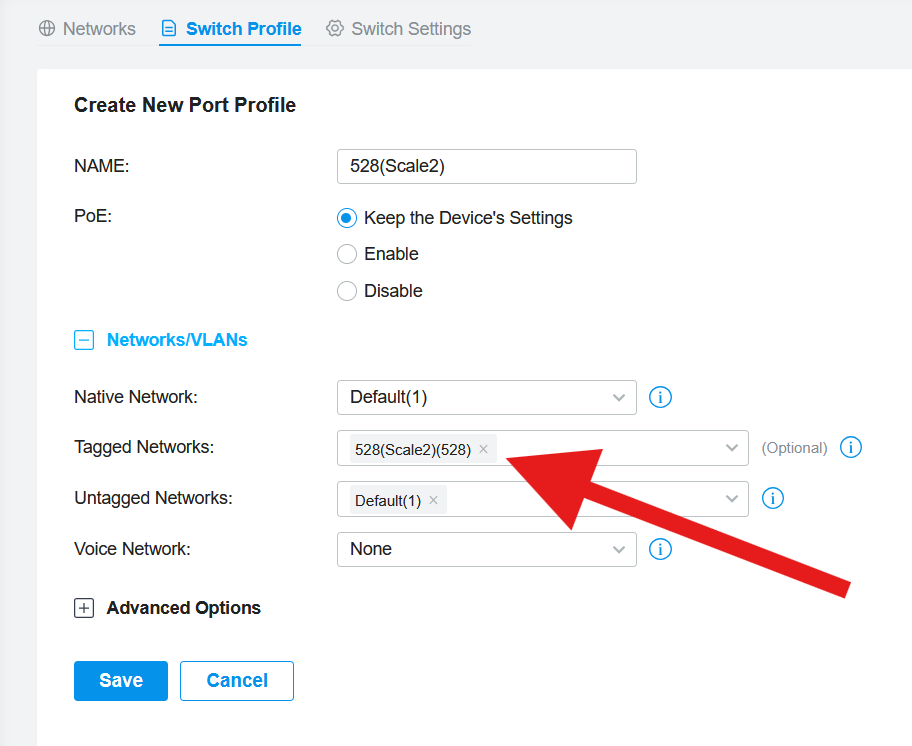
Once you’re in there, you can keep everything as you found it (assuming that the default network is the one you’re going to use to manage and beat on your cluster with). For “Tagged Networks”, add the VLAN you just created.
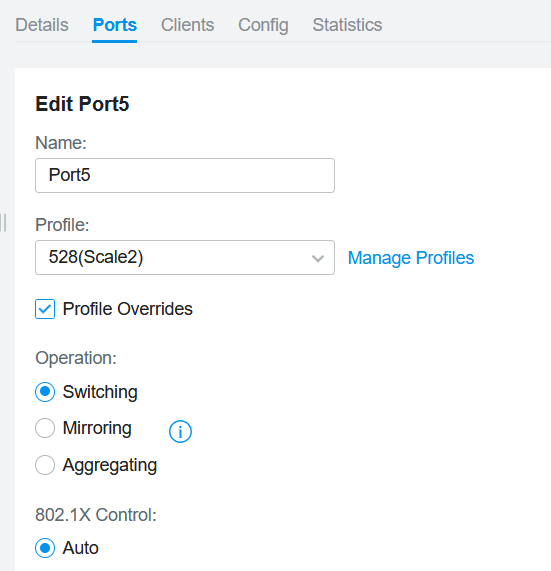
Next, head over to the “Switch Settings” tab, and select the “Edit Port Profile” button. You’ll see your switches ports in a flyout from the right. Figure out what ports you’d like to make use of for your lab equipment, select the “Action” button, and assign the profile you just created to a port. You can also select multiple ports and do a batch assign if you have a bunch of changes to make at once.
That’s it! You’re ready to stage your Scale devices. Be mindful that you’ll need your IP info, your backplane IPs, etc, but your network configuration is good to go! If you’re all the way at the bottom of this article, I know this seems like a whole lot, but thats because I use many words when few will do. You’ve got this!
Happy Scaling!